OpenCV简单标准数字识别的完整实例
发布日期:2022-01-10 08:02 | 文章来源:源码之家
在学习openCV时,看到一个问答做数字识别,里面配有代码,应用到了openCV里面的ml包,很有学习价值。
https://stackoverflow.com/questions/9413216/simple-digit-recognition-ocr-in-opencv-python#
import sys
import numpy as np
import cv2

im = cv2.imread('t.png')
im3 = im.copy()

gray = cv2.cvtColor(im,cv2.COLOR_BGR2GRAY)#先转换为灰度图才能够使用图像阈值化

thresh = cv2.adaptiveThreshold(gray,255,cv2.ADAPTIVE_THRESH_GAUSSIAN_C,cv2.THRESH_BINARY,11,2)  #自适应阈值化

##################Now finding Contours###################
#
image,contours,hierarchy = cv2.findContours(thresh,cv2.RETR_LIST,cv2.CHAIN_APPROX_SIMPLE)
#边缘查找,找到数字框,但存在误判

samples =  np.empty((0,900)) #将每一个识别到的数字所有像素点作为特征,储存到一个30*30的矩阵内
responses = []#label
keys = [i for i in range(48,58)] #48-58为ASCII码
count =0
for cnt in contours:
 if cv2.contourArea(cnt)>80:  #使用边缘面积过滤较小边缘框
  [x,y,w,h] = cv2.boundingRect(cnt)
  if  h>25 and h < 30:  #使用高过滤小框和大框
count+=1
cv2.rectangle(im,(x,y),(x+w,y+h),(0,0,255),2)
roi = thresh[y:y+h,x:x+w]
roismall = cv2.resize(roi,(30,30))
cv2.imshow('norm',im)
key = cv2.waitKey(0)
if key == 27:  # (escape to quit)
 sys.exit()
elif key in keys:
 responses.append(int(chr(key)))
 sample = roismall.reshape((1,900))
 samples = np.append(samples,sample,0)
if count == 100:  #过滤一下过多边缘框,后期可能会尝试极大抑制
 break
responses = np.array(responses,np.float32)
responses = responses.reshape((responses.size,1))
print ("training complete")

np.savetxt('generalsamples.data',samples)
np.savetxt('generalresponses.data',responses)
#
cv2.waitKey()
cv2.destroyAllWindows()
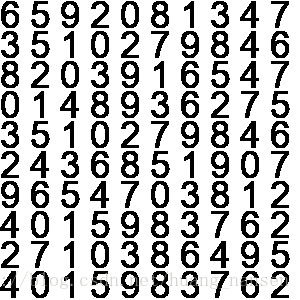
训练数据为:
测试数据为:

使用openCV自带的ML包,KNearest算法
import sys
import cv2
import numpy as np
#######training part ###############
samples = np.loadtxt('generalsamples.data',np.float32)
responses = np.loadtxt('generalresponses.data',np.float32)
responses = responses.reshape((responses.size,1))
model = cv2.ml.KNearest_create()
model.train(samples,cv2.ml.ROW_SAMPLE,responses)
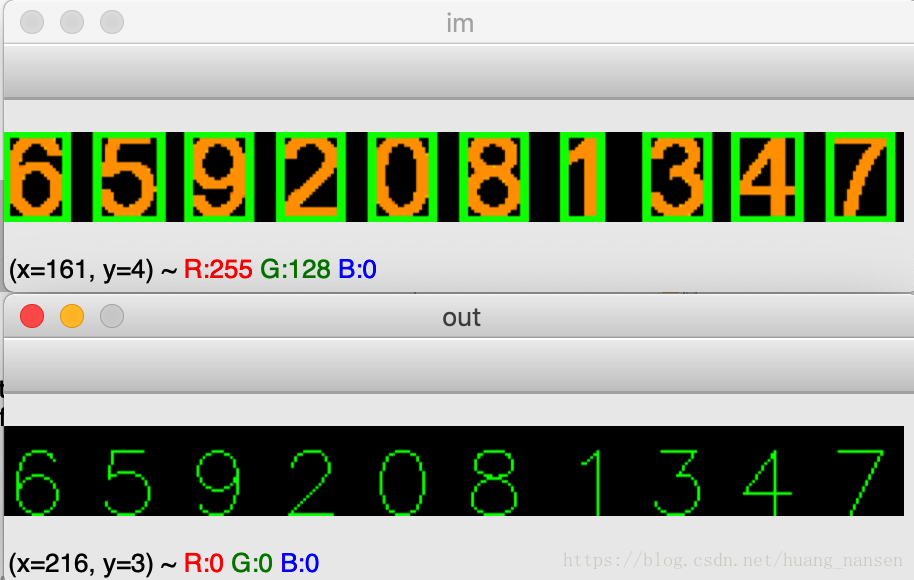
def getNum(path):
im = cv2.imread(path)
out = np.zeros(im.shape,np.uint8)
gray = cv2.cvtColor(im,cv2.COLOR_BGR2GRAY)
#预处理一下
for i in range(gray.__len__()):
for j in range(gray[0].__len__()):
if gray[i][j] == 0:
gray[i][j] == 255
else:
gray[i][j] == 0
thresh = cv2.adaptiveThreshold(gray,255,1,1,11,2)
image,contours,hierarchy = cv2.findContours(thresh,cv2.RETR_LIST,cv2.CHAIN_APPROX_SIMPLE)
count = 0
numbers = []
for cnt in contours:
if cv2.contourArea(cnt)>80:
[x,y,w,h] = cv2.boundingRect(cnt)
if h>25:
cv2.rectangle(im,(x,y),(x+w,y+h),(0,255,0),2)
roi = thresh[y:y+h,x:x+w]
roismall = cv2.resize(roi,(30,30))
roismall = roismall.reshape((1,900))
roismall = np.float32(roismall)
retval, results, neigh_resp, dists = model.findNearest(roismall, k = 1)
string = str(int((results[0][0])))
numbers.append(int((results[0][0])))
cv2.putText(out,string,(x,y+h),0,1,(0,255,0))
count += 1
if count == 10:
break
return numbers
numbers = getNum('1.png')
总结
到此这篇关于OpenCV简单标准数字识别的文章就介绍到这了,更多相关OpenCV标准数字识别内容请搜索本站以前的文章或继续浏览下面的相关文章希望大家以后多多支持本站!
版权声明:本站文章来源标注为YINGSOO的内容版权均为本站所有,欢迎引用、转载,请保持原文完整并注明来源及原文链接。禁止复制或仿造本网站,禁止在非www.yingsoo.com所属的服务器上建立镜像,否则将依法追究法律责任。本站部分内容来源于网友推荐、互联网收集整理而来,仅供学习参考,不代表本站立场,如有内容涉嫌侵权,请联系alex-e#qq.com处理。
相关文章
 关注官方微信